Geofences
Creating and using geofences
Mark out areas on the map to get alerts when vehicles enter or leave, see who is inside right now, and run presence and dwell reports.
Walkthrough Creating and using geofences1 screenshots
- Mark out the places that matter
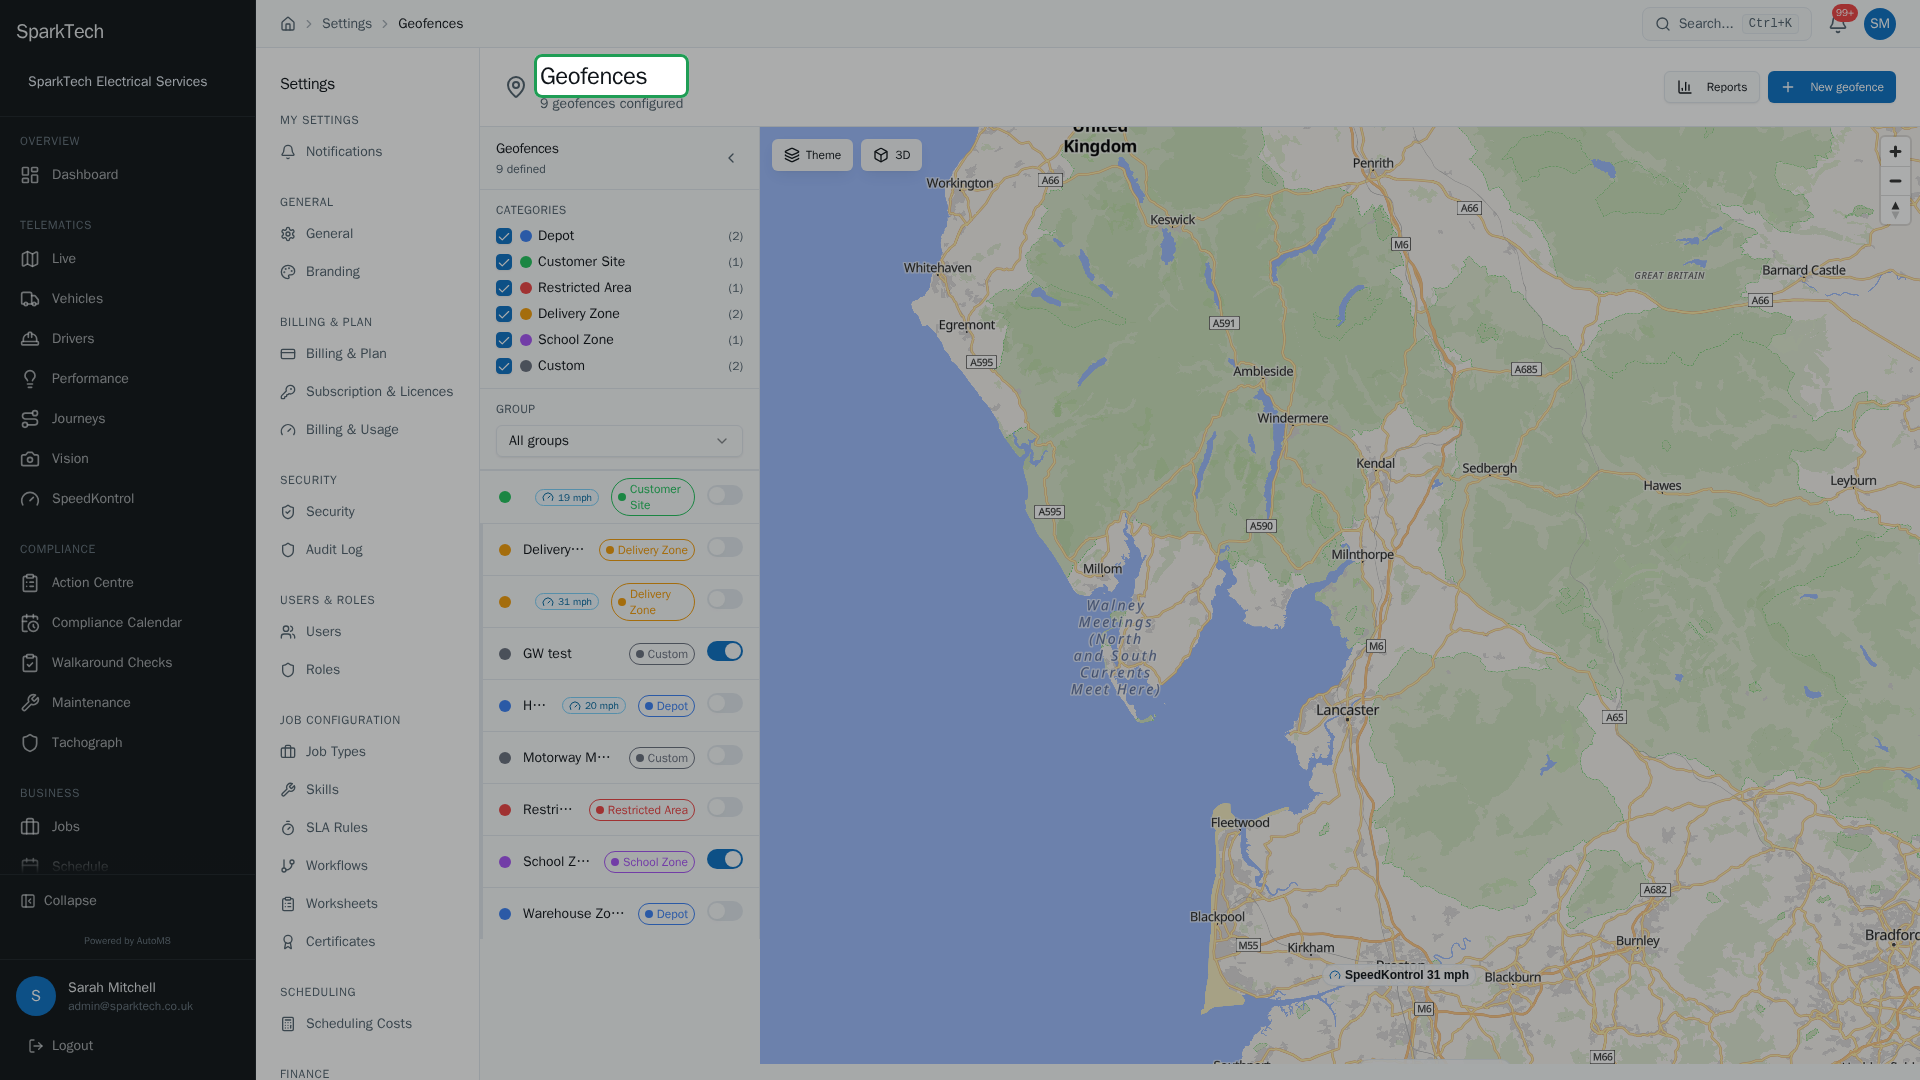
Go to Settings then Fleet then Geofences. The sidebar lists your zones, colour-coded by category - depot, customer site, restricted area, delivery zone and more - and speed zones carry their mph limit.
A geofence is an area you mark out on the map - a depot, a customer site, a restricted area - so AutoM8 can tell you when vehicles enter or leave it, how long they stay, and who is inside right now.
Permissions. Seeing geofences needs Geofences View (in the FMS (Fleet Management) group). Creating and editing them needs Geofences Manage; importing needs Geofences Import; and running reports needs Geofences Reports. Administrator and Manager include these by default. Permissions live in Settings > Roles and Permissions.
You manage geofences in Settings > Fleet > Geofences. The page has three parts: a sidebar on the left (category filters, group filter and the geofence list), the map in the middle, and a detail panel on the right that opens when you select a geofence.
Creating a geofence
Who can do this: any role with the Geofences Manage permission (Import for the import option).
- Go to Settings > Fleet > Geofences.
- Click New geofence at the top right. It is a single dropdown menu; choose how to create the geofence:
- Draw polygon - click each corner on the map, double-click to finish.
- Draw circle - click the centre, move out, then click to set the radius.
- Draw corridor - click waypoints along a route to make a route-shaped zone.
- From site - create a circle around an existing customer site (pick the site and a radius in metres). The site must have GPS coordinates.
- Import - bring in geofences from a file (needs the Geofences Import permission).
- After you draw, a Create Geofence form opens. Give it a name (required), and optionally a category, a group, a colour and a description.
- Open Alert Settings and Schedule in the form if you want to set them now; you can always change them later from the detail panel.
- Click Create Geofence.
The menu only shows the create methods your permission allows: the draw and From site options need Geofences Manage, and Import needs Geofences Import.
Quick create on the map. Right-click anywhere on the map and choose Create geofence here. This drops a 100 metre circle at that spot and opens the form, so you can name it and then adjust the size and shape afterwards.
Draw shortcuts. With the map focused (and no text field selected), press P to start a polygon and C to start a circle. Press Esc to cancel drawing at any time.
Categories
Geofences are colour-coded by category: Depot, Customer Site, Restricted Area, Delivery Zone, School Zone and Custom. Choosing a category sets a default colour, which you can override. You can also add your own categories, and they appear alongside the built-in ones.
Creating a geofence in the Restricted Area category turns its entry alert on automatically, so you hear about anything going in.
The detail panel
Who can do this: anyone with Geofences View can open the panel; changing anything needs Geofences Manage.
Select a geofence in the list or on the map to open its detail panel. The top of the panel shows the geofence’s colour, name and shape type, plus an Edit on Map link to redraw it. Below that are three tabs: Details, Events and Alerts.
Details tab
The Details tab is where you edit the geofence itself:
| Field | What it does |
|---|---|
| Active | Toggle the geofence off to stop it firing alerts and appearing on the live map, without deleting it. Toggle it back on when you need it again. |
| Name | Rename the geofence. |
| Description | Optional notes. |
| Category | Change the category; this also updates the default colour. |
| Group | Assign the geofence to a group (only shown when you have groups). |
| Colour | Pick any colour for the map. |
| SpeedKontrol zone | Turn the geofence into a speed-limiting area - see Speed control - and set a default limit (see below). |
| Dwell Thresholds | A Min and Max dwell time, in minutes (see below). |
| Schedule | Choose the days and time range the geofence is active. Leave it blank to monitor all the time. |
A Save Changes button appears at the bottom once you have edited anything; nothing is saved until you click it. A small badge near the top shows whether the geofence is Active now, Always active or inactive under its current schedule.
Redraw the shape. Use Edit on Map (at the top of the panel) to redraw the polygon, circle or corridor without recreating the geofence. Draw the new shape and it replaces the old one.
Dwell thresholds
The Min and Max dwell fields (in minutes) describe how long a visit is expected to last. These are separate from the Max dwell alert on the Alerts tab - the thresholds describe normal behaviour for the zone, whereas the alert is what actually sends a notification when a vehicle stays too long.
Events tab
The Events tab shows what is happening in this geofence:
- Currently Inside - a live list of the vehicles inside the geofence right now, each with a running dwell counter that ticks up every second for as long as the vehicle stays.
- Recent Events - a table of entry and exit events with columns for Time, Vehicle, Event (entry or exit) and Dwell (how long the vehicle stayed, shown on exit). The log is paginated; use Previous and Next to page through it.
Alerts tab
The Alerts tab sets who gets alerted and when. Start by choosing who the alerts apply to under Target:
- All Vehicles - every vehicle in your fleet.
- Vehicle Group - a single vehicle group you pick.
- Specific Vehicles - a multi-select list; search by registration and tick each vehicle you want.
Then turn on the alerts you want:
| Alert | Fires when |
|---|---|
| Entry alert | A targeted vehicle enters the geofence. |
| Exit alert | A targeted vehicle leaves the geofence. |
| Max dwell alert | A vehicle stays longer than the Max dwell (minutes) you set here. |
| Not arrived alert | A vehicle has not reached the geofence in time (it fires when a vehicle has not reached the geofence within the expected time set for that alert). |
Click Save Alert Settings to apply your changes.
Fire only once per visit. Turn this on and entry and exit alerts fire once when a vehicle enters or leaves. Turn it off and alerts repeat while the condition still holds, no more often than the Alert cooldown (minutes) you set. The cooldown field only appears when “Fire only once per visit” is off - it is the minimum gap between repeated alerts for the same event type.
The Schedule on the Details tab still applies, so alerts only fire during the hours you care about.
SpeedKontrol zones
Who can do this: any role with the Geofences Manage permission.
A geofence can double as a SpeedKontrol zone - an area with a default speed limit. Turn on SpeedKontrol zone on the Details tab (or in the create form) and set a Default speed limit (mph). Speed zones are shown on the map with a permanent chip labelled with their limit, for example “SpeedKontrol 20 mph”, and are marked in the geofence list so they stand out from plain geofences.
For how speed zones are grouped, sent to the vehicle’s controller and kept in sync, see Speed control.
Filtering and grouping
Who can do this: anyone with the Geofences View permission.
The sidebar keeps the map readable on a busy fleet:
- Category filters - tick the categories to show; the map and list update to match, and each category shows a count. Your choice is remembered for next time.
- Group filter - if you organise geofences into groups, filter the map and list to a single group.
- Collapse - collapse the sidebar to give the map more room.
Reports
Who can do this: any role with the Geofences Reports permission.
Click Reports on the geofences page to open the reports panel. It has four tabs, each with a From / To date range and an Export CSV button:
- Entry/Exit Log - every entry and exit with the time, geofence, vehicle and dwell time. You can also filter by vehicle registration.
- Dwell Summary - per geofence and vehicle: number of visits and the average, shortest and longest time inside.
- Vehicle Presence - per geofence and vehicle: first entry, last exit (or “Inside now”), visit count and total time inside. You can filter by vehicle registration and by geofence name.
- Route Compliance - expected versus actual visits per day, with a compliance percentage.
The on-screen tables show a sample; use Export CSV to download the full dataset.
On the live map
Your geofences also appear on the live map for anyone with Geofences View.
Troubleshooting
Why was there no alert when a vehicle entered a geofence? Work through the Alerts tab: the Entry alert must be turned on, and the vehicle must be in the alert Target (All Vehicles, the chosen Vehicle Group, or the specific vehicles you ticked). If Fire only once per visit is on, the alert only fires on the first entry of a visit, not again until the vehicle has left and returned. And if repeated alerts are on, they wait out the Alert cooldown between fires. Check too that the geofence is Active and within its Schedule hours.
Why is a geofence not showing on the map? The map’s Geofence overlays layer may be turned off - open Map Settings (the cog) on the live map and turn it on. On the geofences page itself, check the category and group filters in the sidebar are not hiding it, and that the geofence is Active.
For permission, scope or licence causes, see Troubleshooting.
Related
- Live map.
- Speed control - how SpeedKontrol zones are grouped and sent to vehicles.
- Geofencing is one of the tools in AutoM8 vehicle tracking.