Vehicles
Creating and managing vehicles
Add a vehicle, edit it, assign a driver, find it and remove it - every everyday action on the vehicle record.
Walkthrough Creating and managing vehicles5 screenshots
- Your vehicles, all in one place
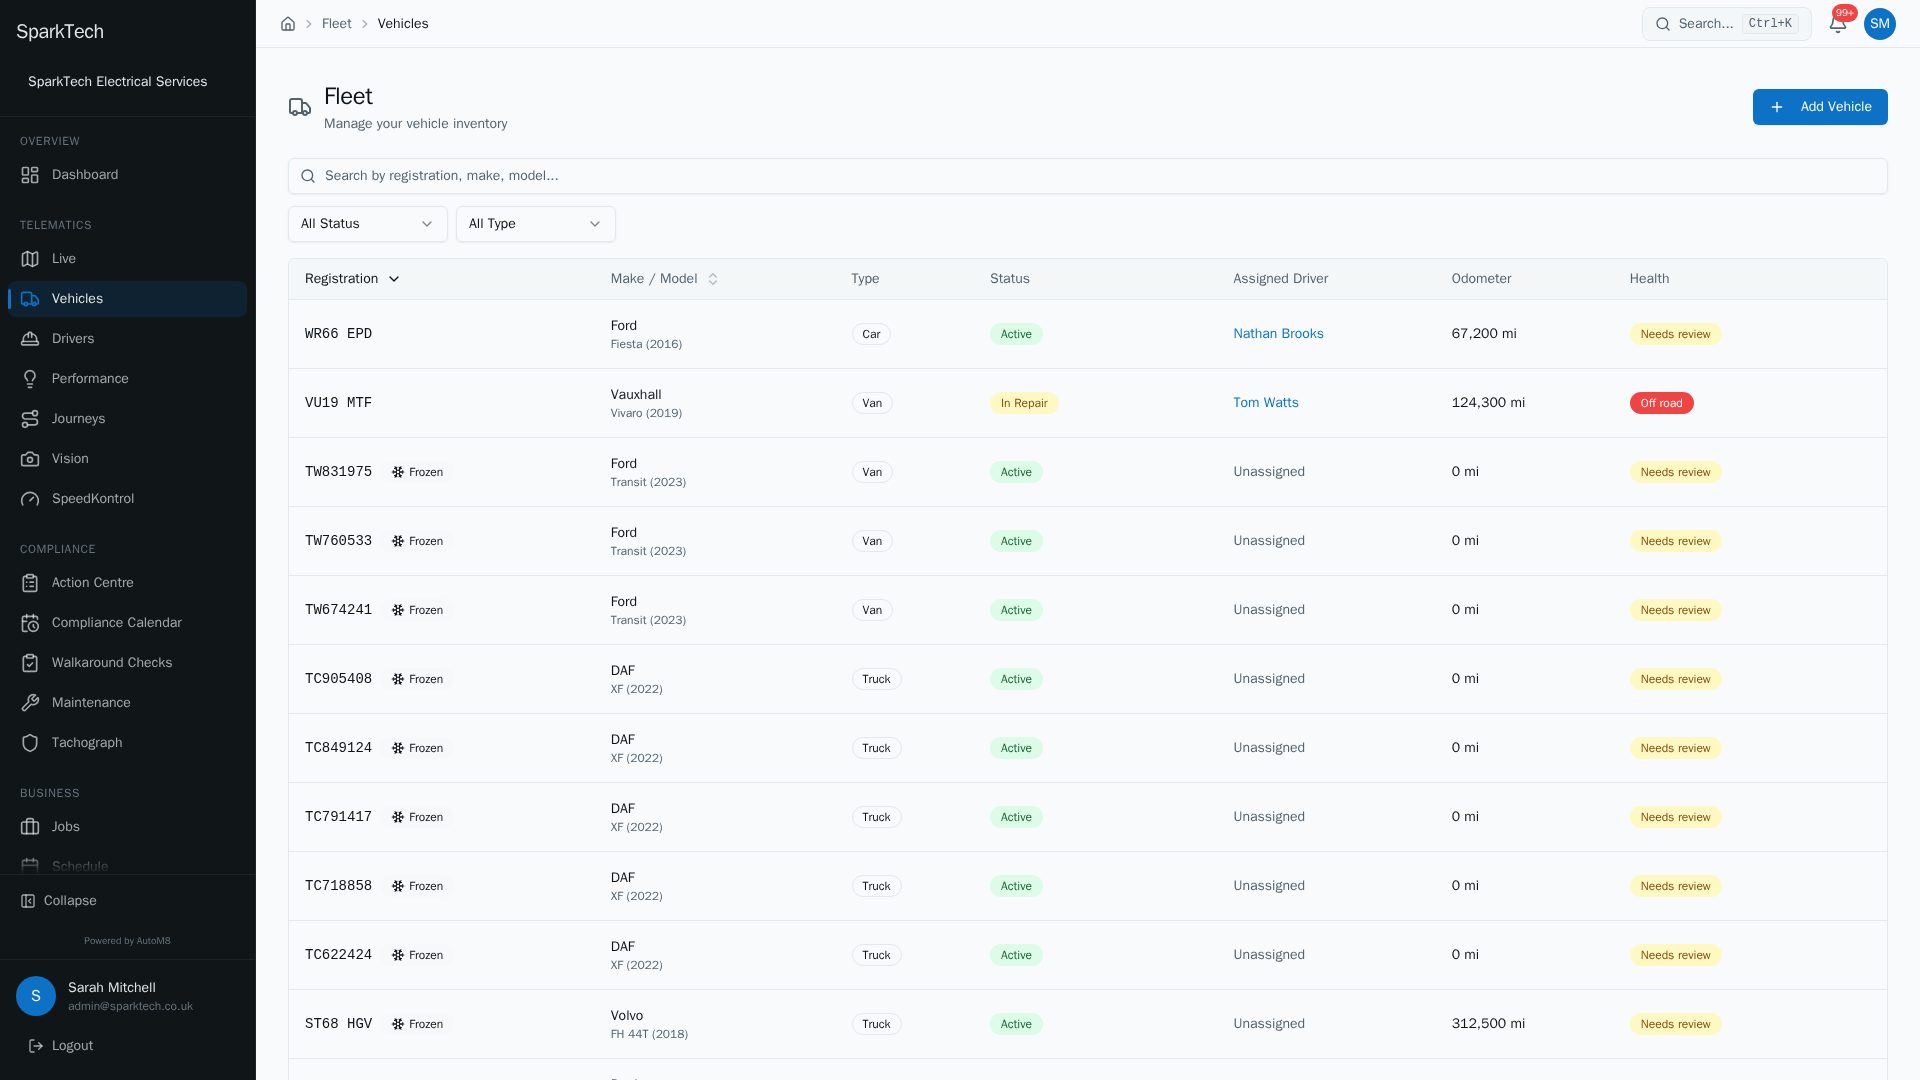
Open Telematics then Vehicles. Each row shows the registration, make and model, type, status, its assigned driver and a health status.
- Select "Add Vehicle" to create one
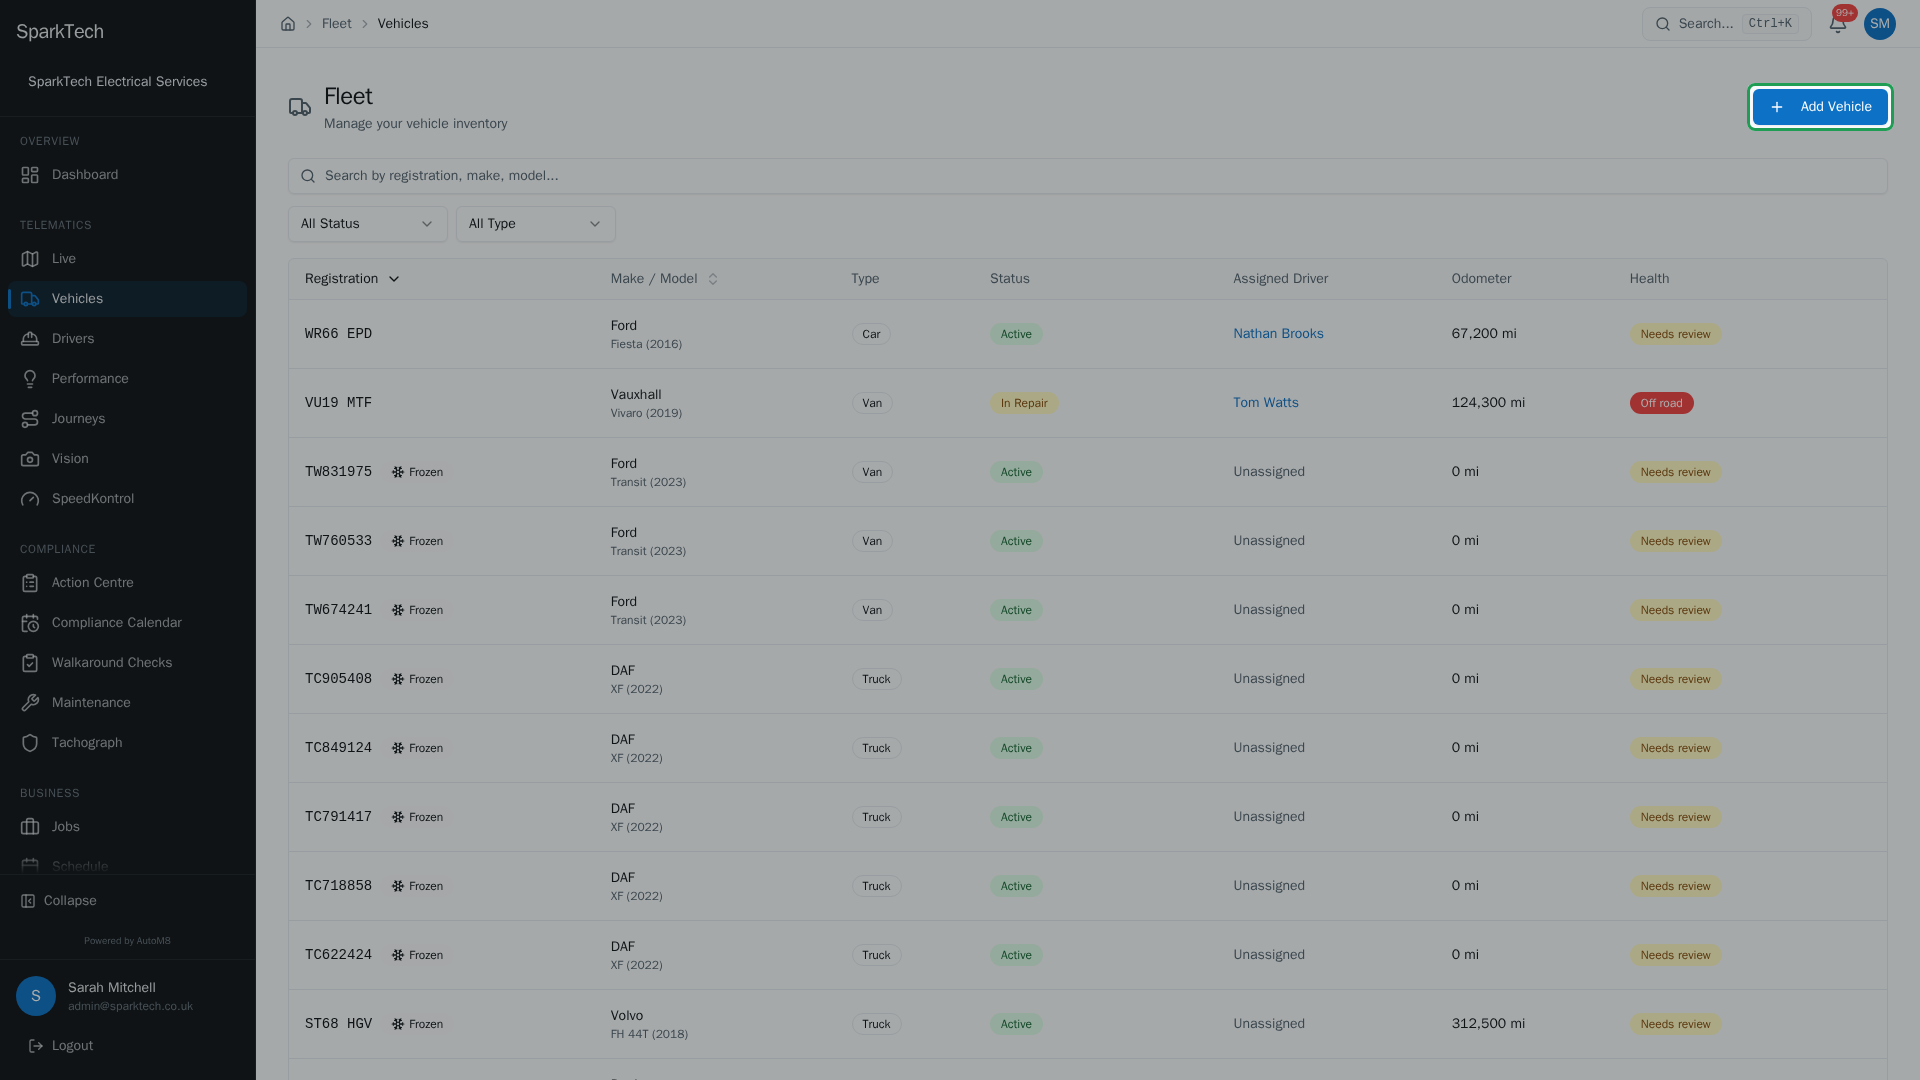
To add a vehicle, select Add Vehicle in the top right. You need the Vehicles Manage permission.
- Enter the registration and AutoM8 does the rest
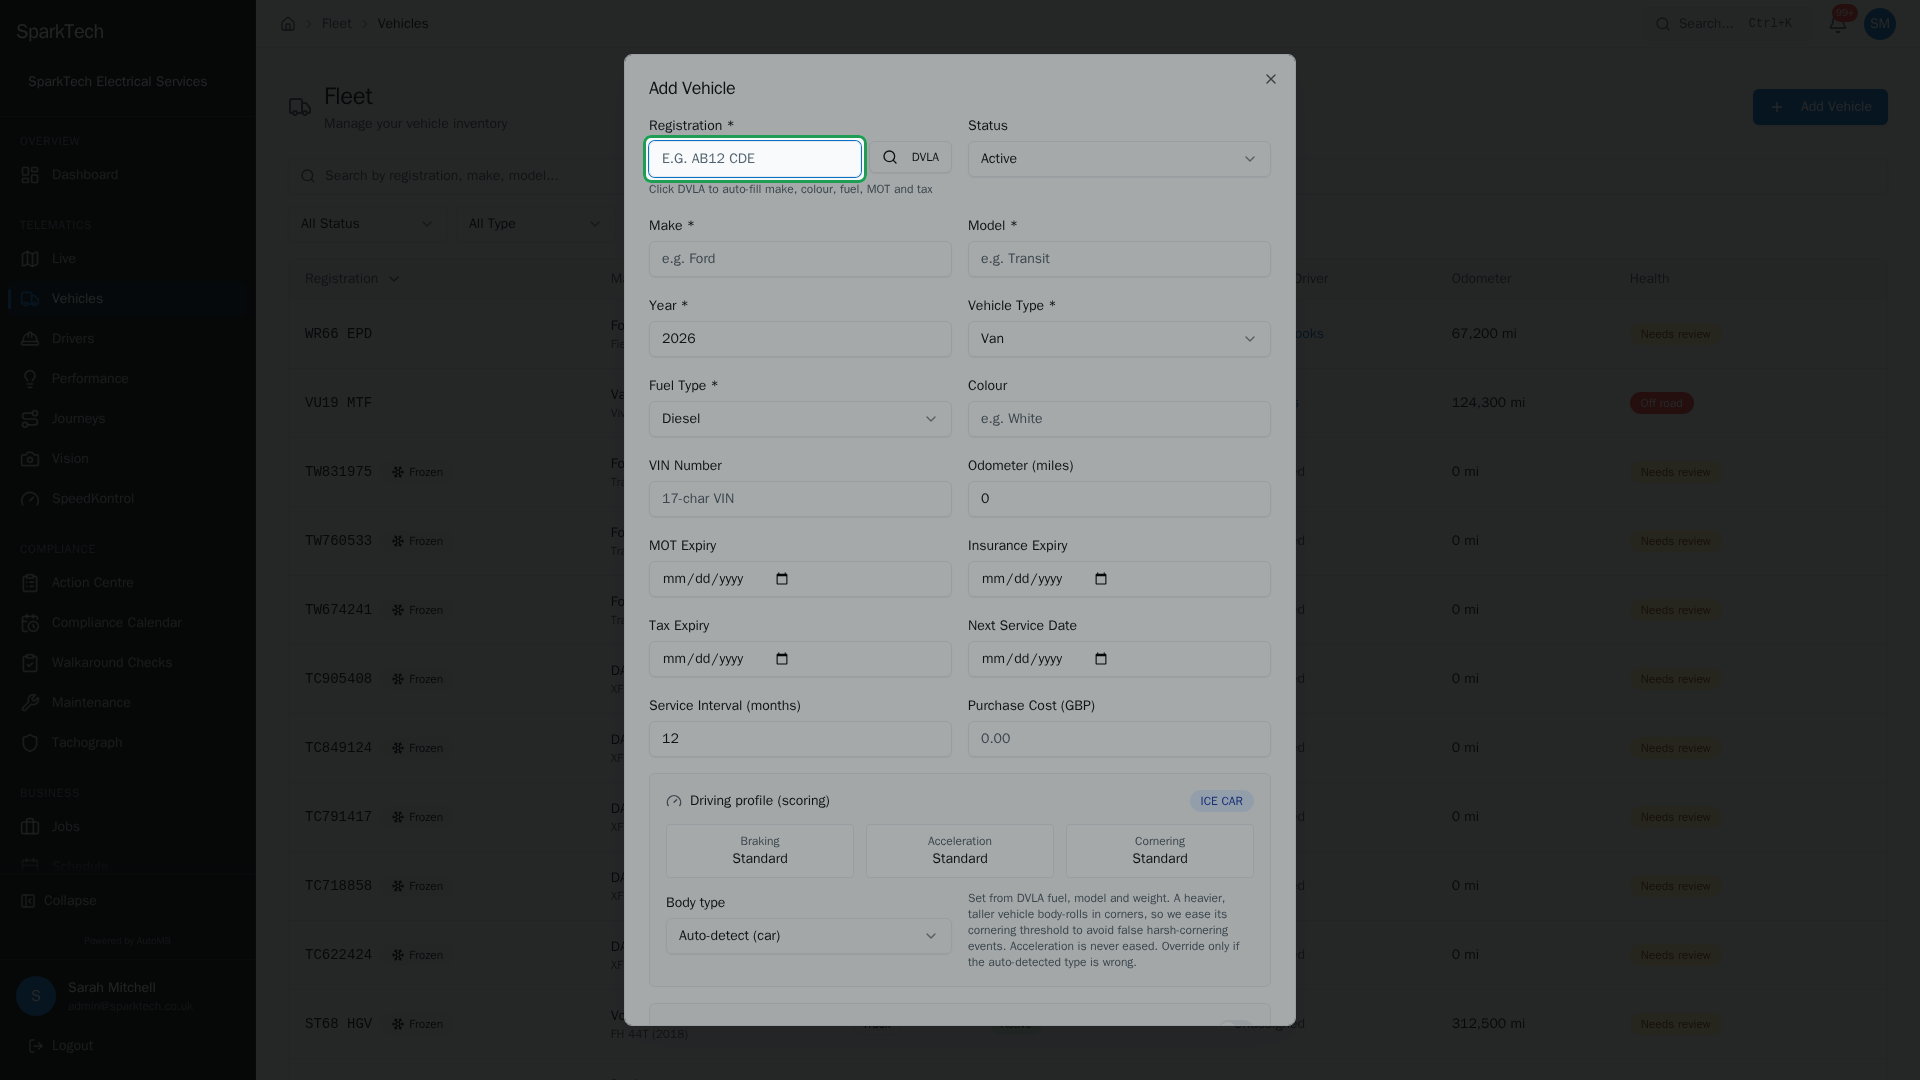
Type the registration. AutoM8 looks the plate up with the DVLA and fills in the make, colour, year, fuel type, MOT and tax dates for you.
- The vehicle detail page
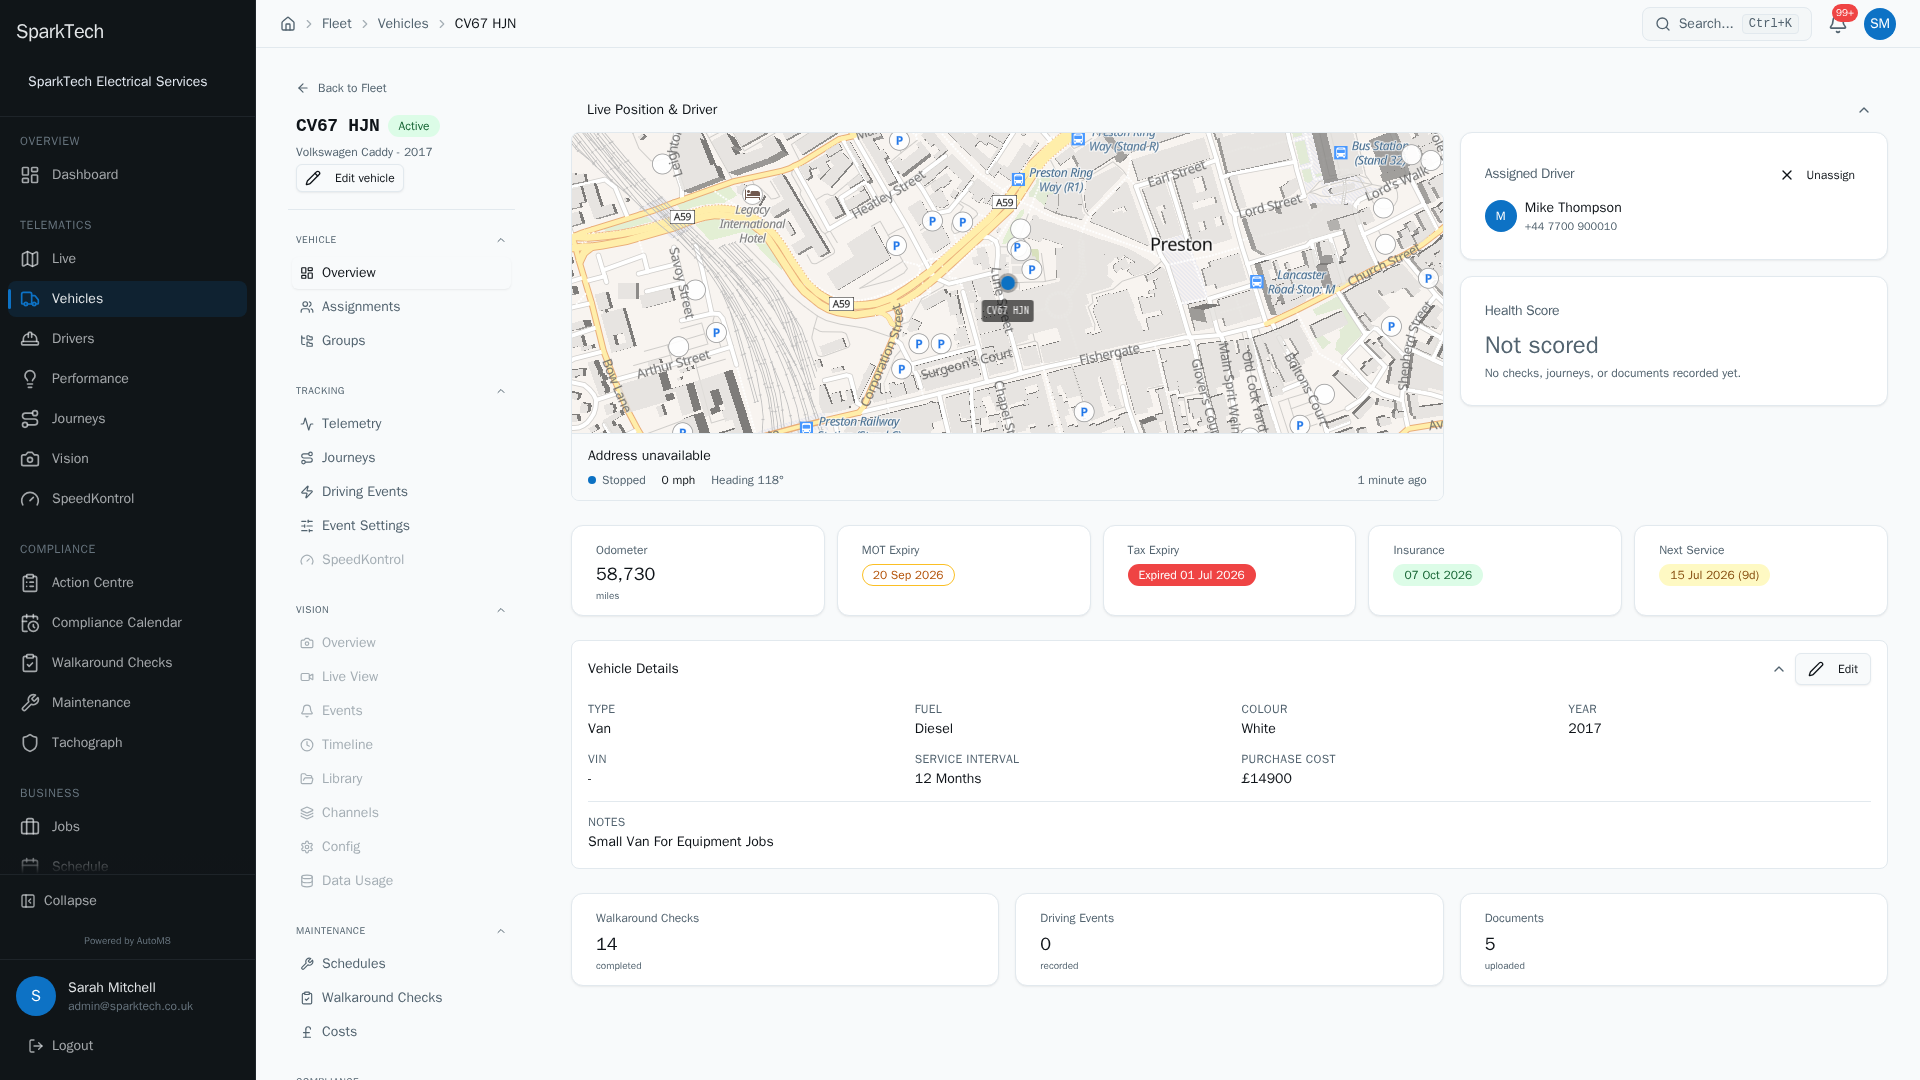
Open a vehicle to see its detail. The Overview tab is its dashboard: a live position, a health score, and the key MOT, tax and service dates.
- Everything about this vehicle, grouped
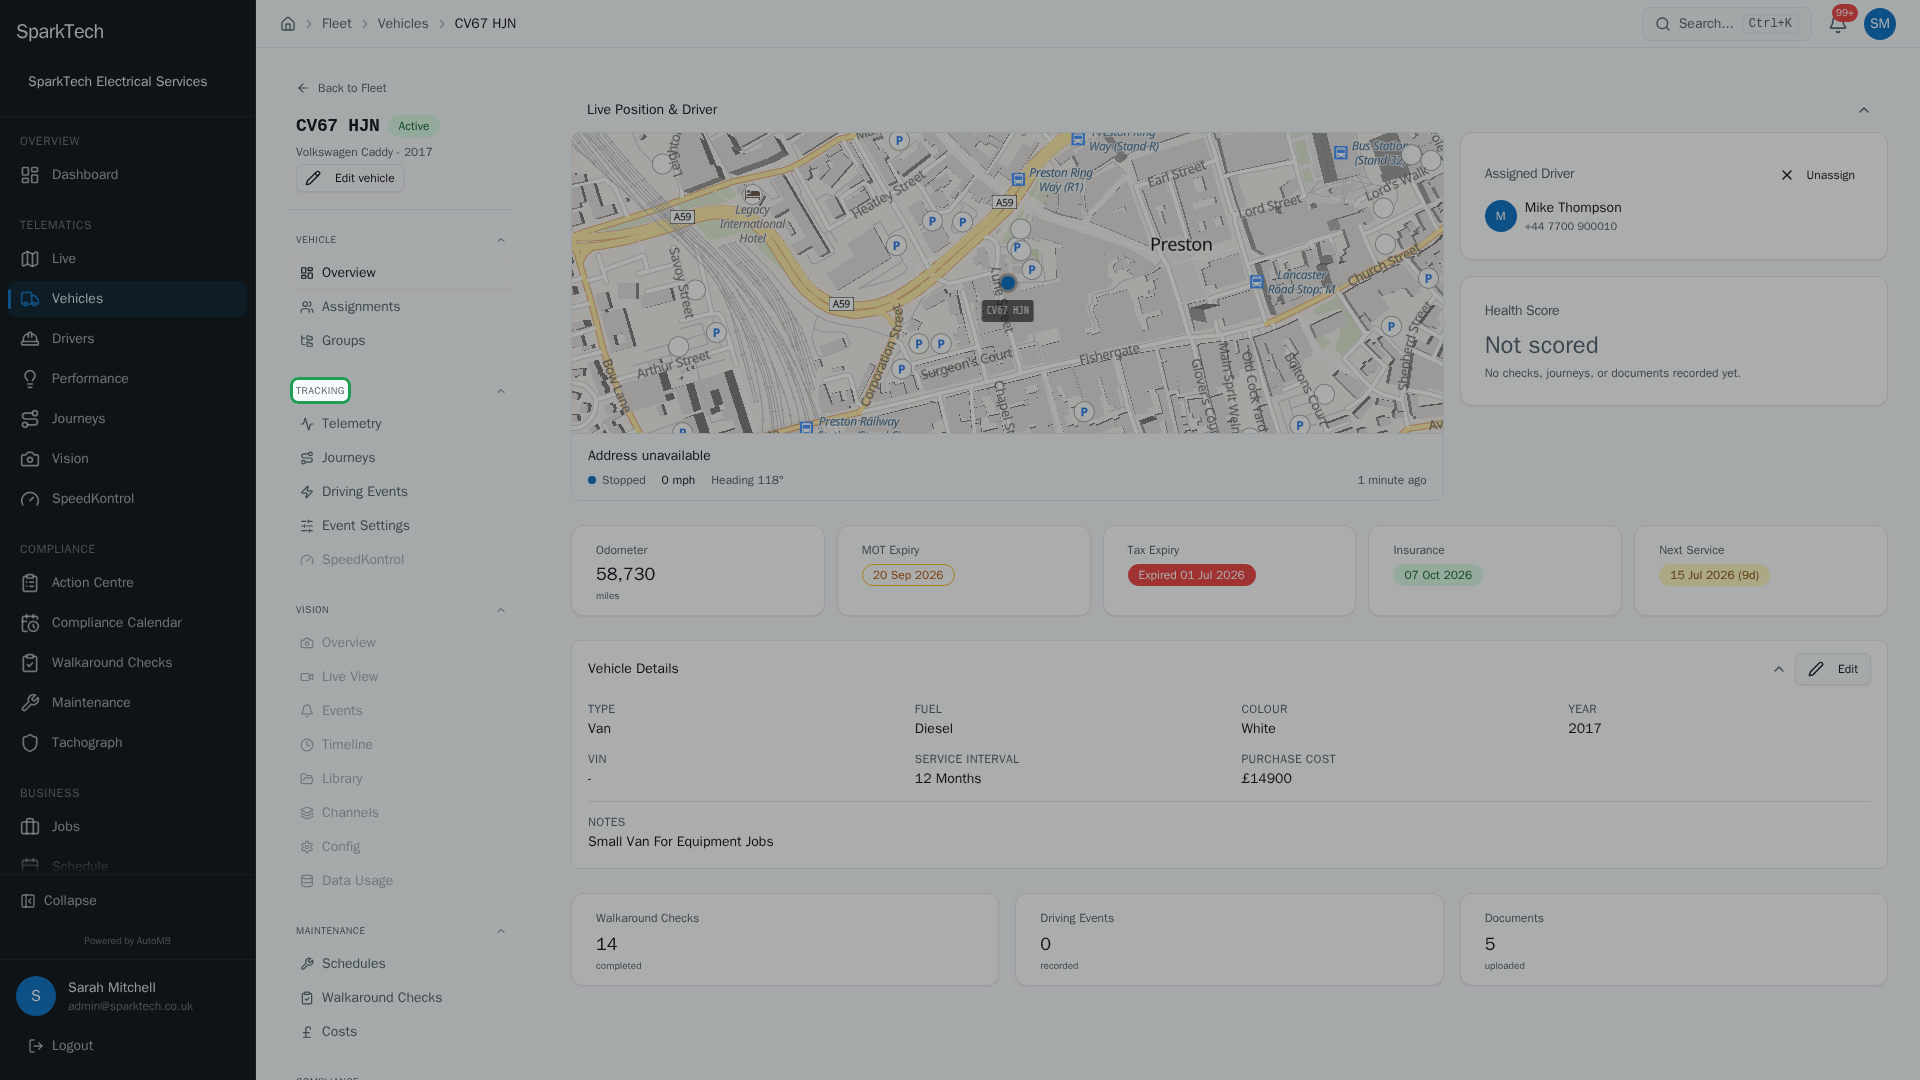
A left-hand menu groups the vehicle into Vehicle, Tracking, Vision, Maintenance, Compliance and Activity. Items that need hardware or a higher plan are shown when available.
A vehicle is the asset at the centre of AutoM8. This page covers everything you can do to the vehicle record itself: create it, edit it, assign a driver, find it, and remove it.
A vehicle record on its own is not yet tracked. To see a vehicle move on the live map you also need to licence it and fit a tracking device. See Taking a vehicle live for the full go-live sequence, and Subscription and licences for what a licence is.
Permissions. The actions on this page are controlled per role in Settings > Roles and Permissions, under the FMS (Fleet Management) group. Seeing vehicles needs Vehicles View; the actions below name the permission each one needs. Administrator and Manager include all of them by default.
Creating a vehicle
Who can do this: Administrator or Manager - any role with the Vehicles Manage permission. Before you start: nothing. A vehicle can be created at any time. The only rule is that the registration must be unique within your account.
- Go to Telematics > Vehicles.
- Click Add Vehicle.
- Type the Registration. AutoM8 automatically looks the plate up with the DVLA and fills in the make, colour, year, fuel type, MOT expiry and tax expiry for you. Check the details and correct anything that is wrong.
- Complete the required fields (most are pre-filled by the lookup):
| Field | Required | Notes |
|---|---|---|
| Registration | Yes | Unique within your account. Drives the DVLA lookup. |
| Make | Yes | Manufacturer, e.g. Ford, Mercedes. |
| Model | Yes | e.g. Transit, Sprinter. |
| Year | Yes | Year of manufacture (1900 to 2100). |
| Vehicle Type | Yes | Van, Car, Truck or Motorcycle. |
| Fuel Type | Yes | Diesel, Petrol, Electric or Hybrid. |
| Colour | No | Up to 50 characters. |
| VIN | No | Vehicle Identification Number, up to 17 characters. |
| Odometer Reading | No | Starting mileage. Defaults to 0. See the note below. |
| Purchase Cost | No | e.g. 15000 or 15000.50. |
| Notes | No | Free text. |
- Optionally set the compliance dates: MOT expiry, Insurance expiry, Tax expiry and Next service date, and the Service interval in months (defaults to 12). AutoM8 uses these to raise expiry reminders and schedule the next service.
- Click Add Vehicle.
Odometer note: the odometer you enter here is only a starting baseline. Once the vehicle is tracked, AutoM8 accrues real mileage automatically from completed journeys, so you do not have to keep it up to date by hand.
Optional extras when adding or editing a vehicle
The vehicle form has three optional sections you can expand for more detail. None of them affect your bill.
- Driving profile (scoring). AutoM8 classifies each vehicle so it can score how it is driven fairly (a van and a performance car are held to different standards). If the automatic classification is wrong, set a Body type override (Car, SUV, Performance or Van).
- Emergency vehicle. For blue-light and section 19 vehicles, turn on Emergency vehicle and map the two auxiliary inputs (DIN2 role and DIN3 role) to Section 19, Panic or None.
- Running costs (TCO). Enter figures for the total-cost-of-ownership view and cost analytics: average MPG, fuel price per litre, annual mileage, annual MOT cost, annual road tax, and, if the vehicle is leased or financed, the monthly payment. These are for your own reporting only and are never billed.
What the vehicle detail page shows
Who can do this: anyone with the Vehicles View permission.
Open any vehicle from the list to see its detail page. A left-hand menu groups everything you can do with that vehicle into six sections. Which items you see depends on your plan and the hardware fitted (items that need hardware, such as SpeedKontrol and the Vision tabs, are greyed out until the kit is present).
| Section | Items | What each shows |
|---|---|---|
| Vehicle | Overview, Assignments, Groups | The dashboard, the driver assignment history, and which vehicle group this vehicle sits in. |
| Tracking | Telemetry, Journeys, Driving Events, Event Settings, SpeedKontrol | The live map and engine data, the trip history, scored driving events, the wired input/output rules, and (if a speed controller is fitted) its speed profile. |
| Vision | Overview, Live View, Events, Timeline, Library, Channels, Config, Data Usage | Everything for a fitted camera system: live and recorded footage, camera events, the clip library, per-channel setup and data usage. |
| Maintenance | Schedules, Walkaround Checks, Costs | Service schedules, walkaround check results and defects, and running costs. |
| Compliance | MOT & DVLA, Tachograph, Documents, Thatcham | MOT and DVLA data, tachograph data, uploaded documents with expiry badges, and Thatcham monitoring. |
| Activity | Tasks & Reminders, Timeline | Tasks and reminders for this vehicle, and a dated log of everything that has happened to it. |
Some items also need their own permission on top of Vehicles View. A few are part of a higher plan: Walkaround Checks, Maintenance schedules and Tachograph carry a Manage plan required marker.
The Overview tab
The Overview tab is the vehicle’s dashboard. It shows:
- A live position map with the current driver alongside it.
- A Health Score card, broken down into four sub-scores: checks, driving, documents and maintenance.
- Key stat cards for the odometer, and the MOT, tax, insurance and next-service dates (each with an expiry badge).
- A Vehicle Details panel with an Edit button.
The engine data (CAN) gauges and the live map also appear on their own under Tracking > Telemetry.
Editing a vehicle
Who can do this: Administrator or Manager - any role with the Vehicles Manage permission.
- Open the vehicle detail page.
- On the Overview tab, click Edit.
- Change any field. Every field from the create form can be edited.
- Click Save Changes.
If you change the registration, AutoM8 re-checks that the new plate is unique in your account and will warn you if it clashes with another vehicle.
Vehicle status
Every vehicle has an operational status that controls whether it appears in active fleet views. You set it on the Edit form (so it also needs Vehicles Manage).
| Status | Meaning |
|---|---|
| Active | In service and available for assignment. |
| In Repair | Undergoing maintenance or repair. Still visible but flagged. |
| Decommissioned | Retired from the fleet. Hidden from most views. |
Roadworthy status
Separate from the operational status above, a vehicle also has a roadworthy status that reflects its physical fitness for the road. You do not set this by hand; it is driven by your walkaround checks and defects.
| Status | Meaning |
|---|---|
| Roadworthy | Passed all checks, safe to drive. |
| Off Road | Taken off the road, typically due to a dangerous defect. |
| Pending Inspection | Awaiting inspection before returning to service. |
Important: when a walkaround check records a dangerous defect, the vehicle is automatically set to Off Road and can only return to Roadworthy once every dangerous defect is resolved. Walkaround checks and defect management are covered in the Compliance section of this guide.
Assigning a vehicle to a driver
Each vehicle can have one driver at a time, and each driver can have one vehicle at a time.
Who can do this: Administrator or Manager - any role with the Vehicles Assign permission.
- Open the vehicle detail page.
- On the Overview tab, use Assign (or Unassign to clear the current driver).
- Search for and pick the driver, then click Assign. The dialog is just a driver picker - there is nothing else to fill in.
When you assign a driver:
- Any existing driver on that vehicle is automatically unassigned.
- Any existing vehicle held by that driver is also unassigned (one vehicle per driver).
- The new assignment is recorded with a timestamp.
To remove the current driver without adding a new one, click Unassign.
Assigning a driver is about who is responsible for the vehicle. It is not required for GPS tracking, and it is separate from giving that person a login.
Assignment history
The Assignments item (under the Vehicle section) keeps a full history of every assignment: the driver, and when each assignment started and ended. The current assignment is tagged with a Current badge. Drivers are listed here by their driver number.
Finding and filtering vehicles
Who can do this: anyone with the Vehicles View permission.
On the Telematics > Vehicles list you can:
- Search by registration, make or model.
- Filter by status and filter by type.
- Sort the table by its columns.
Each row shows the registration, make and model, type, status and a Health status - OK, Needs review or Off road - worked out from the vehicle’s roadworthiness and its MOT, tax, insurance and next service. A vehicle with no active licence shows a Frozen badge; see Subscription and licences.
What a user sees here is also limited by vehicle groups: a user restricted to certain groups only sees vehicles in those groups.
Deleting a vehicle
Who can do this: Administrator or Manager - any role with the Vehicles Manage permission.
Vehicles are soft-deleted. Deleting a vehicle removes it from active views but preserves all of its history (journeys, checks, events) so nothing is lost.
- Open the vehicle detail page.
- Click Delete.
- Confirm in the dialog.
Deleting a vehicle is different from setting its status to Decommissioned. Decommissioned keeps the vehicle in the fleet (retired but visible in history views); deleting hides it entirely. If you only want to retire a vehicle, change its status instead.
Troubleshooting
Why can’t I see a vehicle in the list? Most often your view is limited to certain vehicle groups, so you only see vehicles in the groups you are scoped to. A vehicle that is not in any group is visible to administrators only. Ask an admin to widen your scope or add the vehicle to a group you can see. See Why can’t I see something?.
Why can’t I edit a vehicle? Editing (and the status, assign and delete actions) needs the Vehicles Manage permission. If you only have Vehicles View, you can open a vehicle but the edit controls are not shown. Ask an admin to grant it in Settings > Roles and Permissions.
Why is a vehicle greyed out? A vehicle with no active licence is Frozen - it shows a Frozen badge and appears greyed out and static on the map, and its live tracking stops. Reactivate its licence in Settings > Subscription & Licences; see Subscription and licences.
Related
- Why can’t I see something? - permissions, visibility scope and frozen vehicles explained.
- Taking a vehicle live - the full sequence from a new record to a tracked vehicle.
- Subscription and licences - what a licence is and what “Frozen” means.
- The vehicle record is the foundation of AutoM8’s fleet management software.
More vehicle topics (documents, walkaround checks, maintenance) are being added to this guide.