Jobs
Timesheets and expenses
Record labour time and costs against a job, with auto-captured time from site geofences.
Walkthrough Timesheets and expenses2 screenshots
- Log the time spent on a job
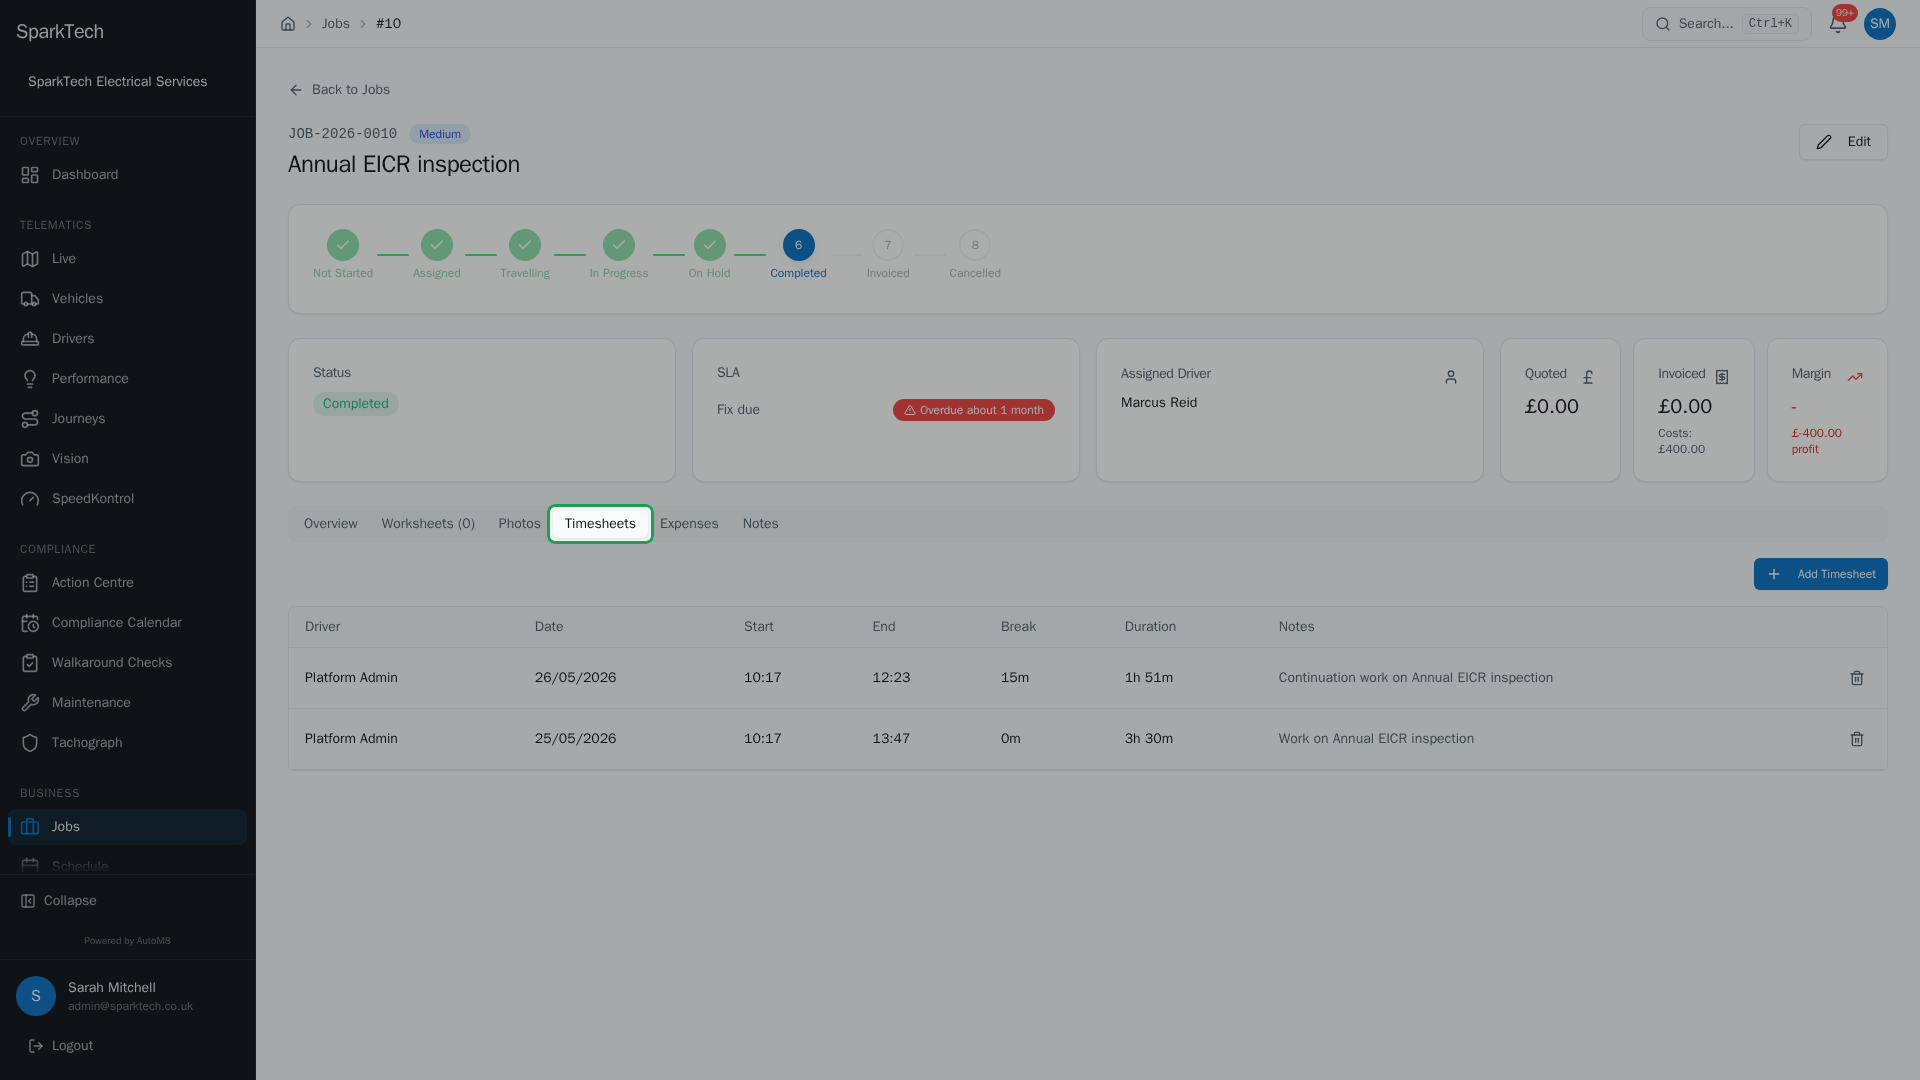
On a job, open Timesheets to record the hours worked. Set the start and end time and any break, and AutoM8 works out the duration for you.
- Record the costs against the job
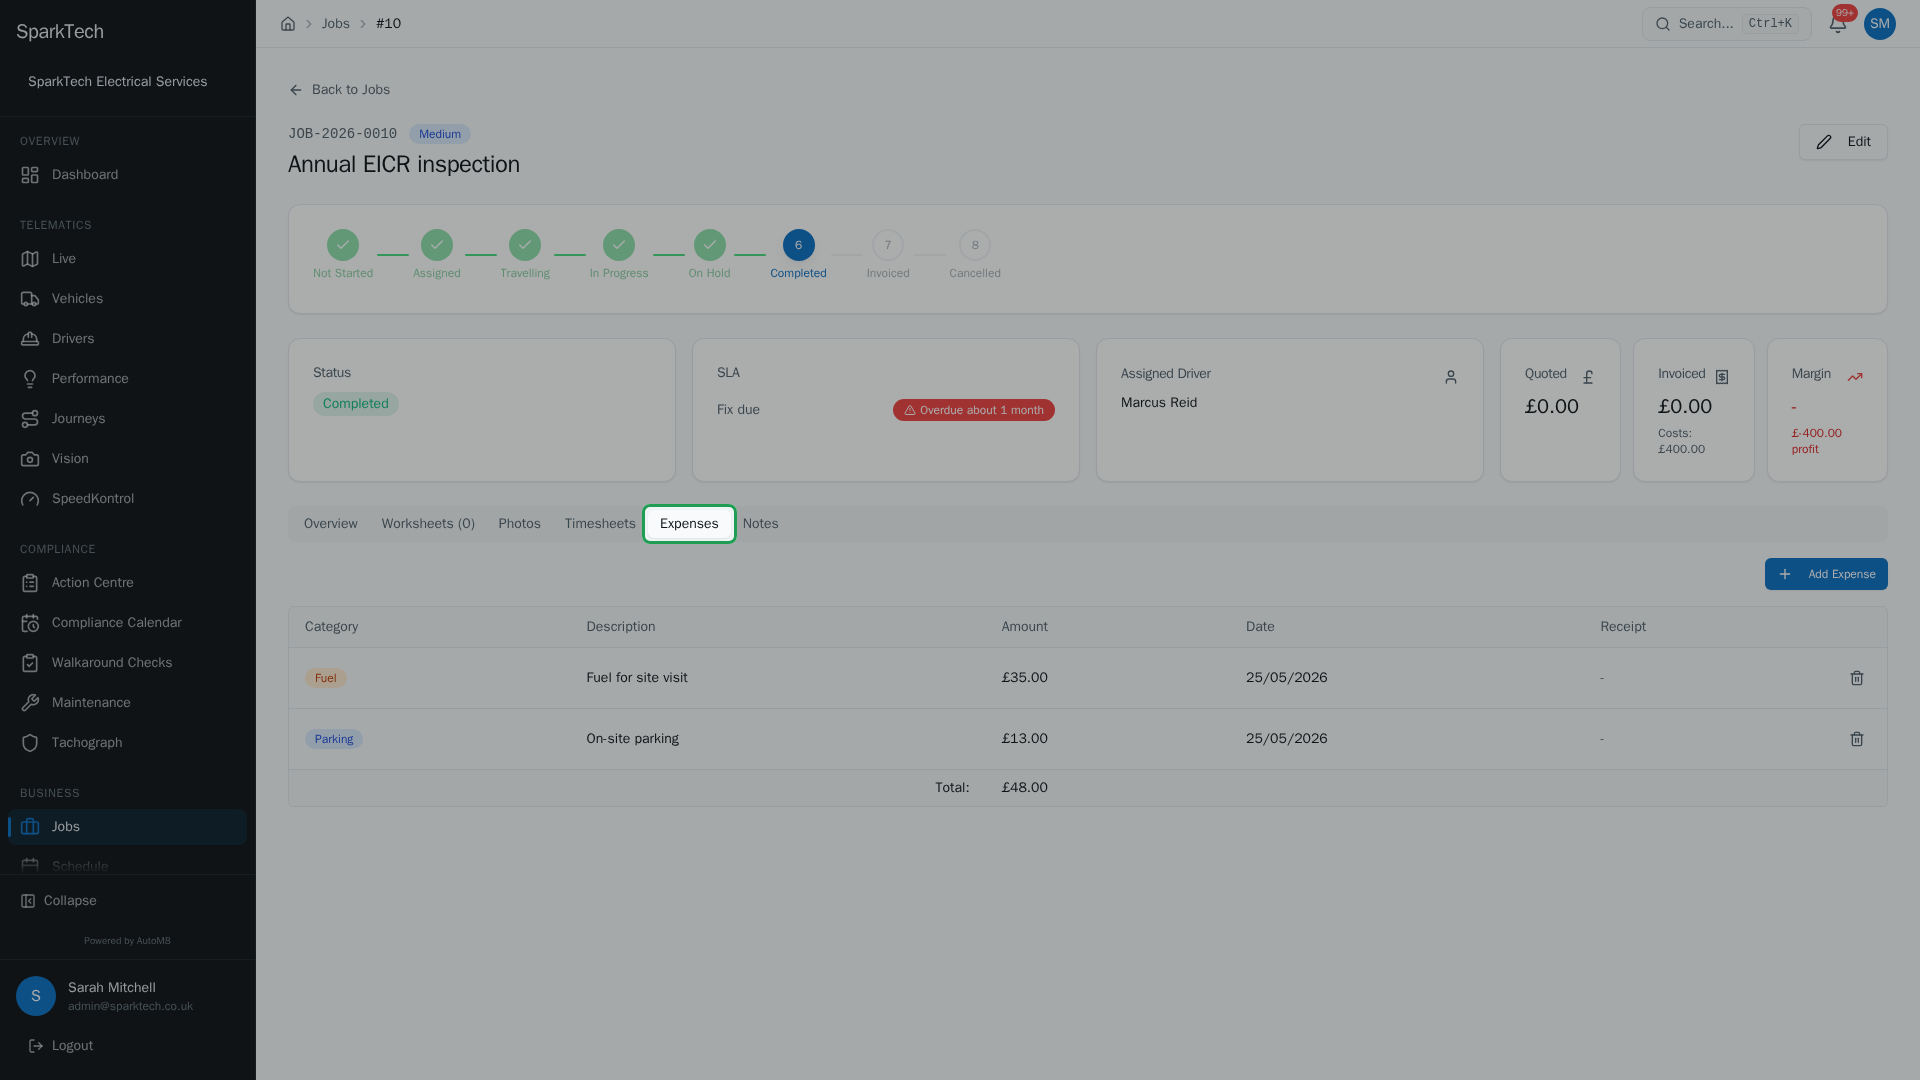
Open Expenses to add costs - fuel, parking, materials and more - each with an amount and date, and see the running total for the job.
Record the time spent and the costs incurred on a job, so labour and expenses sit against the work.
Permissions. These live under Settings > Roles and Permissions, in the Jobs group. Viewing needs Jobs View; adding or editing timesheets and expenses needs Jobs Edit. Administrator and Manager include them by default.
Timesheets
Who can do this: anyone with Jobs Edit.
On a job’s Timesheets tab, choose Add Timesheet and set a Start Time, an End Time, a Break (in minutes), and optional Notes. AutoM8 works out the duration for you.
The table has a row per entry with these columns:
| Column | What it shows |
|---|---|
| Driver | Who the time is for. |
| Date | The day the entry started. |
| Start | Start time. |
| End | End time. |
| Break | Break taken, in minutes. |
| Duration | The worked time, break removed, shown as e.g. 7h 30m. Calculated for you. |
| Notes | Any note on the entry. |
Time captured automatically from geofences
When a driver’s vehicle arrives at and later leaves a customer site geofence (a virtual boundary drawn around a location), AutoM8 can create a timesheet entry automatically from the arrival and departure. These entries:
- carry a Geofence badge,
- are highlighted (a coloured edge on the row), and
- cannot be deleted - they are a record of what the tracker saw.
Entries you added by hand can be removed with the delete action on the row. Site geofences are set up in the fleet area - see Creating and using geofences.
Expenses
Who can do this: anyone with Jobs Edit.
On the Expenses tab, choose Add Expense and set a Category, a Description, an Amount and a Date. The category is one of: fuel, parking, materials, tools, accommodation, food, travel or other. The amount must be greater than zero.
The table lists each expense with its category, description, amount, date and receipt, and shows a running total of all expenses on the job. Where an expense has a receipt attached, a View link opens or downloads it.